To sum it all up, I love cooking and baking. It's basically my obsession. This will be the perfect place for me to show whoever is reading, what I love to do. Sharing my recipes and masterpieces with the world is the most I can ask for. From one future chef to another, from my kitchen to yours, I hope you enjoy!

Search Sammi's Recipes

Saturday, February 4, 2012

"Not your typical Ice Cream Sundae"


Homemade Chocolate Cupcake filled with a chocolate ganache, iced with a "scoop" of vanilla flavored buttercream that tastes and looks like a real scoop of ice cream, drizzled with a chocolate glaze covered in sprinkles and topped with a cherry : ) 

recipe and directions coming soon 


Wednesday, June 1, 2011

The Most Amazing Cookies Ever!


So back on my no carb diet with my good friend I decided to look into some recipes that were "flourless."Anyway as I was looking for substitutes and what would work instead of flour, I then took my favorite candy "reeses" and decided to make a cookie that tasted just like that. So the outcome of this little situation was the famous Peanut Butter and Chocolate Chip cookie. This is single handedly the easiest recipe with the best outcome, not too sweet and just the right amount of peanut butter. I was making it for my family and my dad and grandpa love raisins so I added those in as well but you dont have to. Here is the recipe. Enjoy!

Ingredients:
1 cup super chunky peanut butter
1 cup brown sugar
1 egg
1 tsp baking soda
1/2 tsp vanilla
1 cup mini chocolate chips
*if you want add a cup of raisins

directions: really simple
preheat oven to 350 degrees
Mix all ingredients together. Take a medium size ice cream scooper or just a spoon and place dough on cookie sheet place in oven for 12-15 minutes or until golden brown around the edges. Remove from over place on cooling rack allow to cool. Enjoy!

P.S my friend sarah (from the happy birthday sarah post) says "FANTASTIC! DELICIOUSO! YUMMY IN MY TUMMY" haha I love her

Sunday, May 1, 2011

The Cake Boss


So I can officially say I have met the cake boss himself, Buddy Valastro. He was in new york city at the Hilton giving a seminar about his life and how he built his business from just a little bakery in Hoboken New Jersey to what it is today. Carlos' Bakery used to be a simple bakery that had different kinds of cookies and pastries and a few wedding cakes, just your regular bakery. Now your lucky to get in the front door. Driving past the bakery the line is three blocks long just to go inside. Its insane! But definitely worth it. Anyway back to the seminar- He spoke about his life struggles and what he went through to make his bakery what it is today. He was actually 17 when his father died and he dropped out of school and took over the business. The one thing that stood out to me was his determination. You could tell when he wanted to do something he got it done, nothing stood in his way. He was very inspiring and I suggest if he has another seminar DEFINITELY go see him. After the seminar they were selling his book and he was willing so sign it. I already had the book and didnt even think to bring it with me but I did ask him to sign my phone case and then proceeded to talk about how I am seventeen and have this little cake business. I couldnt believe I was talking about my cakes to the cake boss. He was actually very nice and showed he really was interested in what I had to say. I also told him I was planning on applying to the culinary institute this summer. This was such an amazing experience and like I said if you have a chance to hear him speak and you are interested in Baking go see him and if not take a trip to his bakery because its unbelievable.

I also recommend purchasing his book on amazon !

Thursday, April 21, 2011

Oldies But Goodies

About two months ago my grandma (grammi) gave me a black book full of recipes from her mother, grandmother, and aunts. This was very special to me and although I havent been able to make all the recipes yet I figured I could post two that I am excited about making and maybe some of you can make them too! Let me know what you think ! 

I swear everyones great great great aunt has the same famous recipe for cheese cake- well heres mine 

Cream Cheese Cake 
2 eight oz packages of cream cheese 
1 cup of sugar 
4 eggs (well beaten) 
1 pint of sour cream 
1 tsp of lemon juice 
a pinch of salt 

for the crust- 
2 cups crushed graham crackers 
2 tablespoons of butter (melted)
a slash of vanilla 

For the crust-

Combine ingredients and form at the bottom and edges of a spring form pan. Bake at 350 for 5 minutes 

For cheese cake 

combine all ingredients place on top of baked crust place in oven at 350 for 25 to 30 minutes then turn oven off and let sit for 5 to 10 mins allow to cool in refrigerator over night. 

Award winning Apple Tort 

3 eggs well beaten 
1 cup sugar
1tsp vanilla 
2/3 cup flour 
1/4 tsp salt
2 1/2 tsp baking powder 
some lemon zest

mix all ingredients thoroughly then fold in three large apples sliced and 1 cup of chopped walnuts (optional) bake in 8x12in pan for 40 minutes at 350 

serve with whipped cream 

Enjoy!

Sammi Farber
Teenage Chef 

Thursday, April 7, 2011

Driving In The Safe Lane

SADD 2011


What an amazing night! I was so happy to do this cake for my friends at my old school. They had a few speakers come in and talk about the dangers of being stupid while driving. Some things they spoke about were drinking, texting, and having too many people in a car along with not wearing any seat belts. I wasn't planning on staying but after hearing what the presentation was about I decided to educate myself a little, lol. Anyway, enough about the presentation, even though I could say so much, lets talk about the cake. So the cake was vanilla with chocolate filling and lets just say huge is an understatement. I mean this cake was seriously gigantic, it was 4 sheet cakes about 17in long lined up with another 4 on top, so 8 sheets. I then carved it just enough to give it that "bumpy land" look. Then  I covered the entire cake in green fondant, with fondant balls as the border, and strips of black fondant to look like roads. I also cut out little yellow rectangles to look like the dotted lines in the roads. After the roads were in place it was time to make the cars. They were made out of white chocolate that I colored with different types of luster dust. To finish the cake off I cut out and painted the words "driving in the safe lane," the slogan of the night, and "SADD 2011" onto the cake. The perfect finishing touch! 
Tuesday, March 29, 2011

Lex and the City

Two hundred fifty cupcakes later and I'm still alive. These cupcakes were for a crazy bat mitzvah, where the theme was Lex and the city and the client wanted the cupcakes to be fully "blinged" out. Let me just say, these cupcakes were not so easy to make considering how many there were, but they were a lot of fun to decorate.

Like I said, there were 250 cupcakes, 125 were my signature red velvet, the cake and frosting were actually dyed different color pinks so I guess you can say they were "Pink Velvet." For the frosting I used my cream cheese frosting, a classic to use with red velvet cake.

The other 125 were moist chocolate cakes, these were frosted with my white chocolate cream cheese.  I chose to used white chocolate cream cheese to keep a consistency throughout both of the cakes. We also chose a chocolate cake because red velvet is actually a spin on a chocolate cake so like I said, consistency.

Sunday, March 6, 2011

Seashell Cake

This was a vanilla cake with chocolate buttercream and a chocolate bavarian cream filling. It was covered with baby blue fondant and then decorated with white chocolate seashells and sugar flowers. The chocolate was white at first but I then painted it with different colors of pearl dust and luster dust to give it that "pearl/ shell" look. I loved doing this cake it was perfect and BEAUTIFUL. Let me know what you think. Congratulations to the bride-to-be, hope this cake added on to the fun, that I'm sure you had, at your bridal shower! 

Friday, March 4, 2011

A Black and White Affair


This was an elegant black and white themed engagement party. Even the bride had a beautiful white dress with black lace. I tried my best to have the cake match the dress. It was a vanilla cake with vanilla buttercream and the filling was bavarian cream. It was simply delicious. The cake was covered in white fondant and airbrushed with a pearl shine. It also had black royal icing lace piping. At  first I drew the lace with a food coloring marker, free hand, and then traced it with the icing. Then I added my hand crafted sugar flowers. It still blows my mind that just because people read my blog and see my work they are calling me and placing orders for there affair. Keep them coming! Up next a beach themed bridal shower! Thanks to everyone who let me know what they thought of the cake! And congratulations to the happy couple!

Saturday, February 19, 2011

The Best Steak I Ever Made

Okay this steak is amazing and you have to try it. Its so simple but so good. all you need is sirloin steak (doesnt matter how big) some teriyaki sauce, soy sauce, mustard, garlic paste and oil. This is how you do it. Wash the steak then throw it into a plastic bag then take the teriyaki, soy, mustard oil and garlic and throw a good amount of each into the bag. Seal the bag and mush it all around. Let it sit while you heat the grill. When your grill is heated just throw the steak on your hot spot and cook it for how ever long you want (Depending on how you like your steak) When its done take it off the grill and let it sit for about 5 minutes under tinfoil. After five minutes slice and enjoy!!

Monday, January 17, 2011

S'more Brownies


So I was bored today and decided to search for some new fun recipes on foodnetwork.com.  I came across this S'more Brownie recipe it is amazing and I had to share it with all of you! Take my word on this one and run the your grocery store right now and try out this recipe because you will want to serve these brownies at your next dinner party! 

Ingredients

Crust:

  • 6 tablespoons unsalted butter, melted
  • 1 1/2 cups crushed graham cracker crumbs
  • 2 tablespoons sugar
  • Pinch fine salt

Brownie:

  • 8 tablespoons (1 stick) unsalted butter
  • 4 ounces unsweetened chocolate, chopped
  • 1 cup packed light brown sugar
  • 3/4 cup white sugar
  • 1 1/2 teaspoons pure vanilla extract
  • 1/2 teaspoon fine salt
  • 4 large cold eggs
  • 1 cup all-purpose flour

Topping:

  • 4 cups large marshmallows

Directions 

Position a rack in the lower third of the oven and heat oven to 325 degrees F. Line an 8 by-8-inch square baking pan with foil so it hangs over the edges by about 1 inch.

Wednesday, December 22, 2010

Steak and Sides

So while watching food network yesterday the lovely Ina Garten was on making a fabulous steak and sides meal. This consisted of two filet mignons with a roquefort chive sauce, sauteed wild mushrooms, and onion rings. I, personally, dont care for onion rings or roquefort chive sauce so after setting up a lunch with my friend, I raced to the super market to get all the ingredients for the steak and sauteed mushrooms. After cooking this I brought the meal to my friends house and we devoured it. I thought this meal was so amazing that I had to share it with you. So here is the recipe right off of foodnetwork.com. Hope you all enjoy!

Steak Directions

Ingredients

  • 2 (10-ounce) filet mignon
  • 2 tablespoons vegetable oil
  • 1 tablespoon fleur de sel
  • 1 tablespoon coarsely cracked black peppercorns
  • 2 tablespoons unsalted butter, at room temperature, optional
  • Roquefort Chive Sauce, recipe follows

Directions

Preheat the oven to 400 degrees F.
Heat a large, well-seasoned cast iron skillet over high heat until very hot, 5 to 7 minutes.
Meanwhile, pat the steaks dry with a paper towel and brush them lightly with vegetable oil. Combine the fleur de sel and cracked pepper on a plate and roll the steaks in the mixture, pressing lightly to evenly coat all sides.
When the skillet is ready, add the steaks and sear them evenly on all sides for about 2 minutes per side, for a total of 10 minutes.
Top each steak with a tablespoon of butter, if using, and place the skillet in the oven. Cook the steaks until they reach 120 degrees F for rare or 125 degrees F for medium-rare on an instant-read thermometer. (To test the steaks, insert the thermometer sideways to be sure you're actually testing the middle of the steak.)
Remove the steaks to a serving platter, cover tightly with aluminum foil and allow to rest at room temperature for 10 minutes. Serve hot with Roquefort Chive Sauce on the side.

Roquefort chive sauce:

  • 1 1/2 cups heavy cream
  • 2 ounces French Roquefort cheese, crumbled (4 ounces with rind)
  • 1/2 teaspoon kosher salt
  • 1/4 teaspoon freshly ground black pepper
  • 1 tablespoon chopped fresh chives
Bring the heavy cream to a boil in a small heavy-bottomedsaucepan over medium-high heat. Cook at a low boil, stirring occasionally, until the mixture has become thick and creamy, about 20 minutes. Remove the pan from the heat, add the cheese, salt, pepper and chives and whisk rapidly until the cheese melts.
Yield: 4 servings
http://www.foodnetwork.com/recipes/ina-garten/steakhouse-steaks-recipe/index.html

Sauteed Wild Mushrooms 

Ingredients

  • 2 pounds mixed wild mushrooms, such as cremini, shiitake, porcini, and portobello
  • 1/2 cup good olive oil
  • 1 cup chopped shallots (4 large)
  • 4 tablespoons (1/2 stick) unsalted butter
  • 2 teaspoons kosher salt
  • 1/2 teaspoon freshly ground black pepper
  • 2 tablespoons chopped garlic (6 cloves)
  • 1 cup chopped flat leaf parsley

Directions

Brush the caps of each mushroom with a clean sponge. Remove and discard the stems. Slice the small mushrooms thickly and cut the large ones in a large dice.
Heat the olive oil in a large (11 - inch) Dutch oven or saucepan. Add the shallots and cook over low heat for 5 minutes, or until the shallots are translucent. Add the butter, mushrooms, salt, and pepper and cook over medium heat for 8 minutes, until they are tender and begin to release their juices, stirring often. Stir in the garlic and cook for 2 more minutes. Toss in the parsley, sprinkle with salt, and serve warm.
http://www.foodnetwork.com/recipes/ina-garten/sauteed-wild-mushrooms-recipe2/index.html


Tuesday, December 21, 2010

Rainbow Italian Cookie Cake

Have you ever went to your local bakery and had one of those "rainbow" cookies, you know the ones that are topped with chocolate and have jelly layers in the middle of the three colors? Of course you have. Well for me it was my favorite cookie to eat, but I always wondered what gave it that amazing flavor. So I did a little research and looked at a couple of different recipes online and I guess you can say concocted my own recipe. Like I said I couldnt have done this with out the many wonderful recipes that people have posted online so Id like to take the time to thank them for helping me create my own. So hear it is for all of you to try. Enjoy!


So the Ingredients you will need are:   
3 sticks butter (make sure they are soft enough to cream together with the sugar)
1 1/2 cups granulated sugar
6 large eggs
12.5 ounces (one can) of almond paste
          1/4 teaspoon pure vanilla extract
1 tablespoon pure almond extract 
3 cups all-purpose flour
3 teaspoons baking powder 
10-15 drops of: red, green and yellow food coloring 
1/4-1/2 cup seedless raspberry jam  
1/4-1/2 cup apricot preserves


1. In an electric mixer fit with a paddle cream together the butter and sugar until they are nice and fluffy, this should take anywhere from 3-5 minutes. Then add the eggs and continue to beat for about another 3 minutes.  When the eggs are all blended with the butter and sugar add in the full can of almond paste, vanilla extract and your almond extract. Beat everything together until well blended.  

2. While everything in blending get a separate bowl and sift together the flour and baking powder. If you dont have a sifter just add them into a bowl and whisk them its the same thing. Then after you have sifter that slowly (with caution because the batter will spit the flour back at you) add the dry ingredients to the batter.

3. After everything in mixed together, just like in my cupcake post, you are going to take three bowls out and divide the batter evenly and drop your food coloring into the bowls and mix the color with the batter. You should end up with one bowl of a red/ pink batter, one bowl of green batter, and one yellow batter.

4. After that you need to take the 3 mixtures and pour them into 3 individual pans. This is where you come in. You have to choose what type of pan you want. If you are making a cake I would take 3 9" pans but if you are trying to make the cookies I would take 3 square or rectangle pans and use those. Make sure when you pour the batter into the pans you smooth out the top and then just slide the pans into a oven at 350 degrees for about 25-35 minutes. Just until you can stick a tooth pick into the center and it comes out dry. When the cakes are done, take them out of the oven and allow them to cool for about 5 minutes before you try to remove them to the cooling rack.

5. While the cake is cooling, prepare the ganache. Now ganache is real simple. Just take 1 cup of heavy cream and bring it to a soft boil. Once you see little bubbles forming around the edge take it off the heat and pour the cream into a separate bowl over 12 ounces of semi sweet chocolate. Stir the cream and chocolate together until you get a smooth melted chocolate "syrup" looking mixture in your bowl. Let it cool for a little.

6. As the ganache is cooling you can start layering the cake. Start with the pink/ red layer and then spread the raspberry jam until it reaches the edges of the cake. Then layer the yellow cake on top of that. Spread this with the apricot preserves. Then top it all of with the final green layer.

7.  To put the ganache on the cake I like to just put the cake on a cooling rack and pour the ganache on top and let it slide onto the cake. Then I take a rubber spatula and smooth out the sides. allow the ganache to cool and set for about an hour and a half. Then decorate as you would like.


P.S this time I jut did a plain simple decoration with a fondant ball in the center and I took strips of fondant and wrapped them around tooth picks and let them harden and you get a nice fondant ribbon.


Thursday, December 16, 2010

new posts coming

Upcoming events....

 "present" Rainbow italian cake covered in chocolate ganache with a fondant bow on top

"life's a beach" Upcoming beach themed cake 3 tired baby blue with fondant sea shells

many more !

Cant wait to post my how to's and tips for everyone !

Wednesday, December 1, 2010

Sammis Signature Rainbow Cupcakes


Sammis RAINBOW Tie-dye Cupcakes  


So I used to make these cupcakes that were AMAZING and  I would bring hundreds to my school and just give them away. Everyone loved them, well from what I have heard. Anyways, I think the main attraction of these cupcakes were that they were tie-dye rainbow. A lot of people who have either got the chance to experience them, or just saw a picture of them have asked me how I do it. It is so hard to explain in person so I have taken pictures and am going to list the directions here for everyone to see and make. Trust me they really are amazing and people love it when then bite into it and see the different colors. Oh, and just because they say cupcakes doesnt mean it cant be anything else, someone ordered a tie-dye cake from my once and it was amazing, so you should try that out too. Enjoy! 

Take any recipe wether its original or box and either divide
into four bowls or quadruple the recipe and make 4 batches 

add food coloring 
to each of the batters 


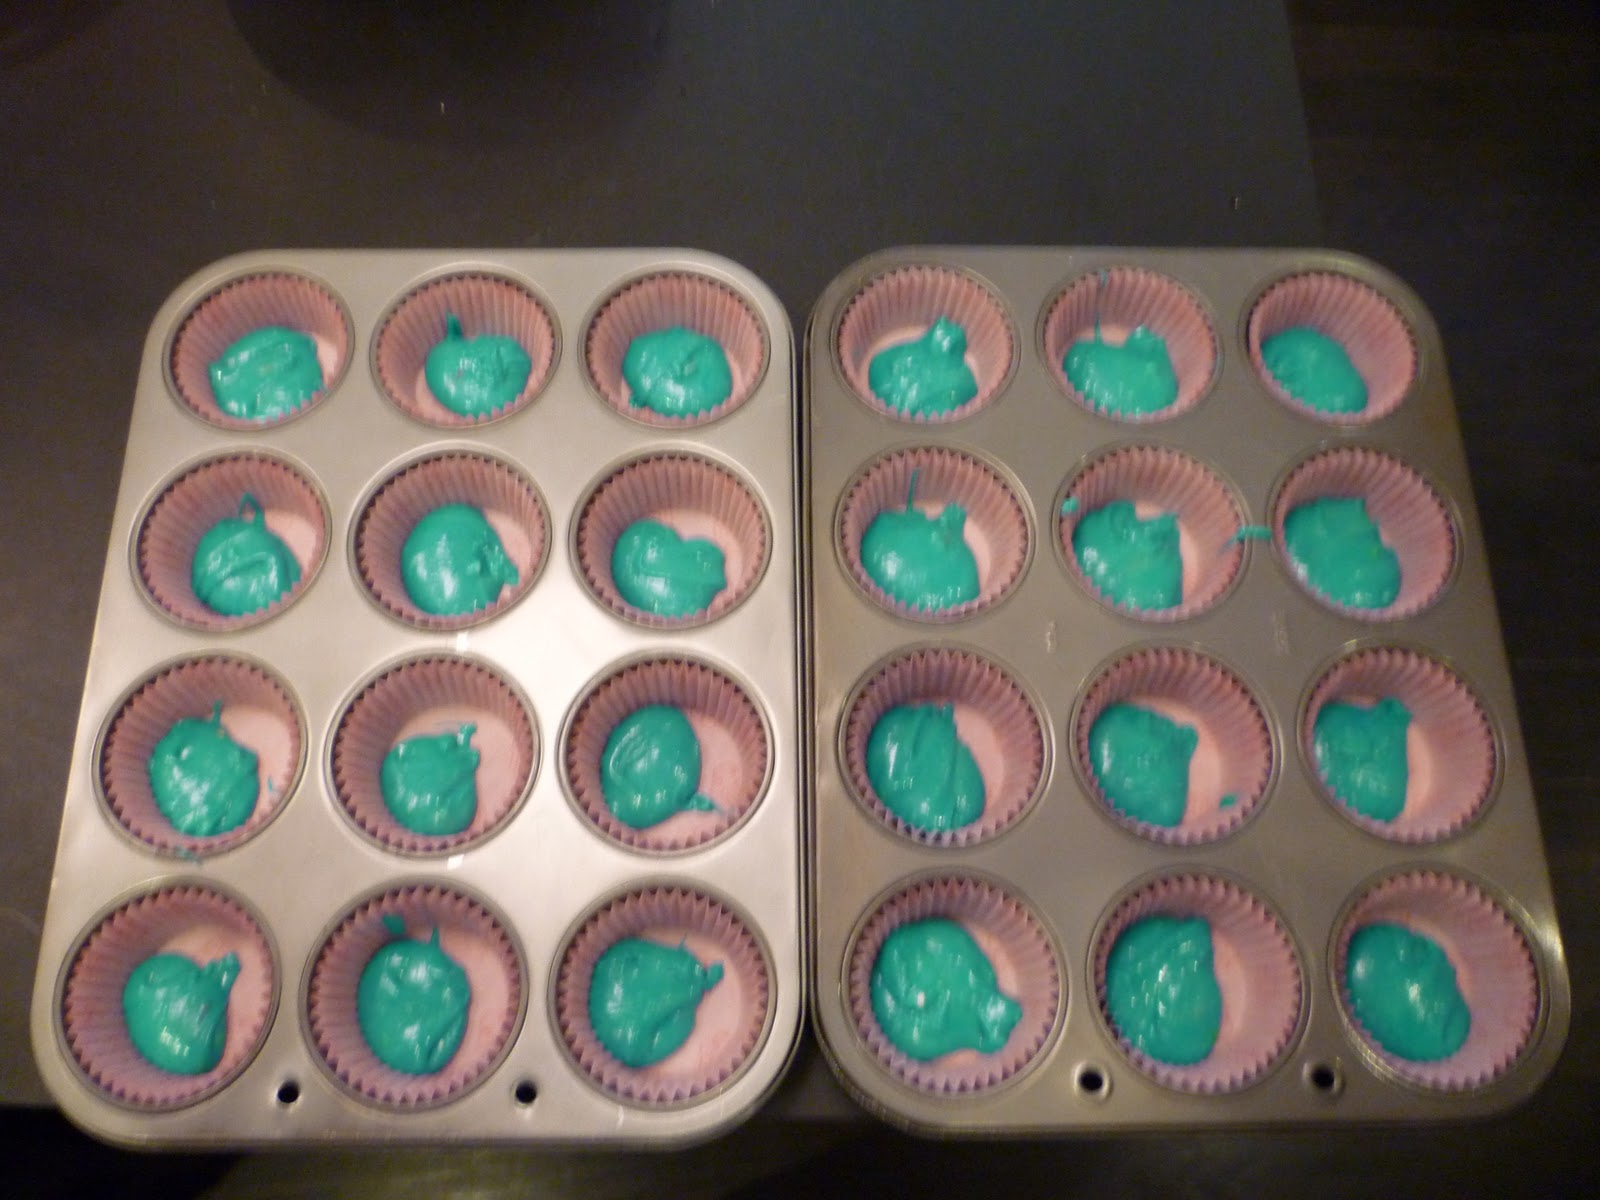
take a ice cream scooper (half a scoop) or a spoon and take a little from one bowl and put in a cupcake tray 

now take the same amount of the next color

and the next 

and the last. You are basically trying to layer the colors 

then with a toothpick or a sharp knife make a single swirl in the cupcake just simply moving the colors together, but remember you are trying to tie-dye and make different colors not blend so be careful  
after you swirl all of them they should look like
this with the top to layers visible 

Finally put in an oven at the proper temperature for the amount of time the recipe calls for and let them cool once they come out  
once they have cooled ice and decorate them however you want 


Sunday, November 28, 2010

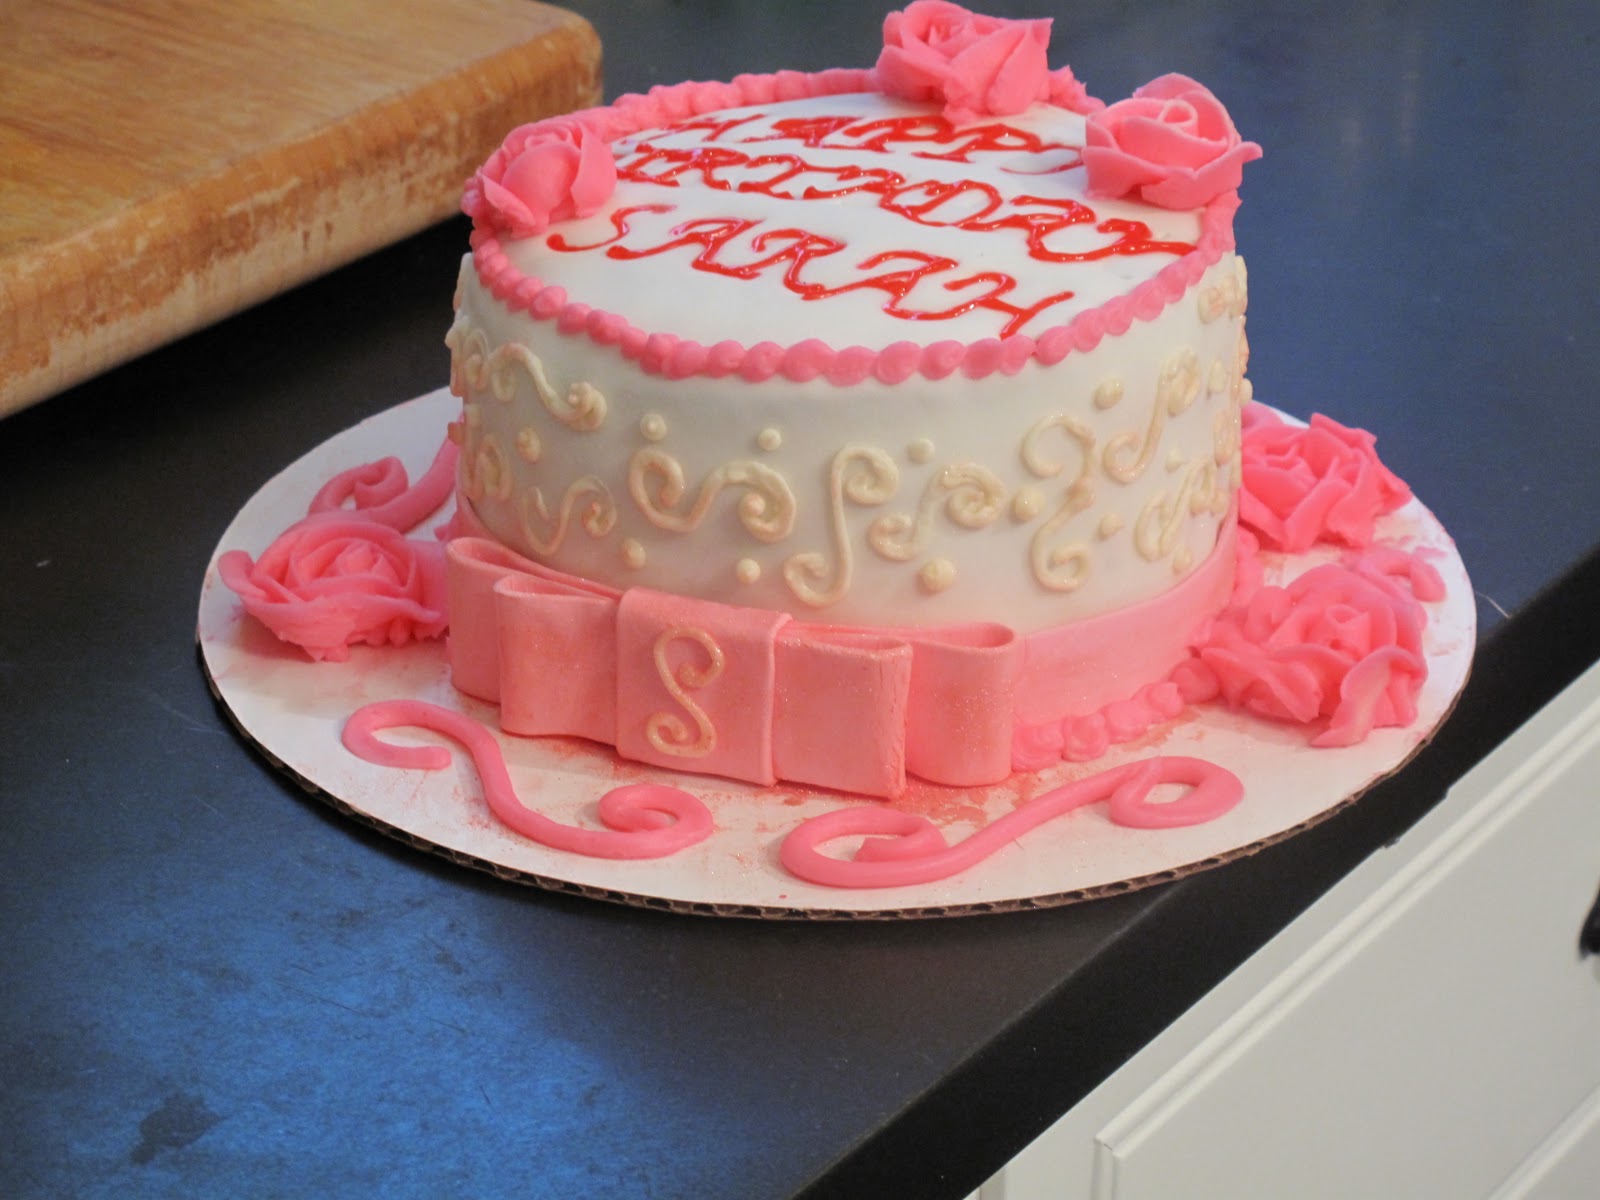
Happy Birthday Sarah!

 Happy Birthday Sarah! 


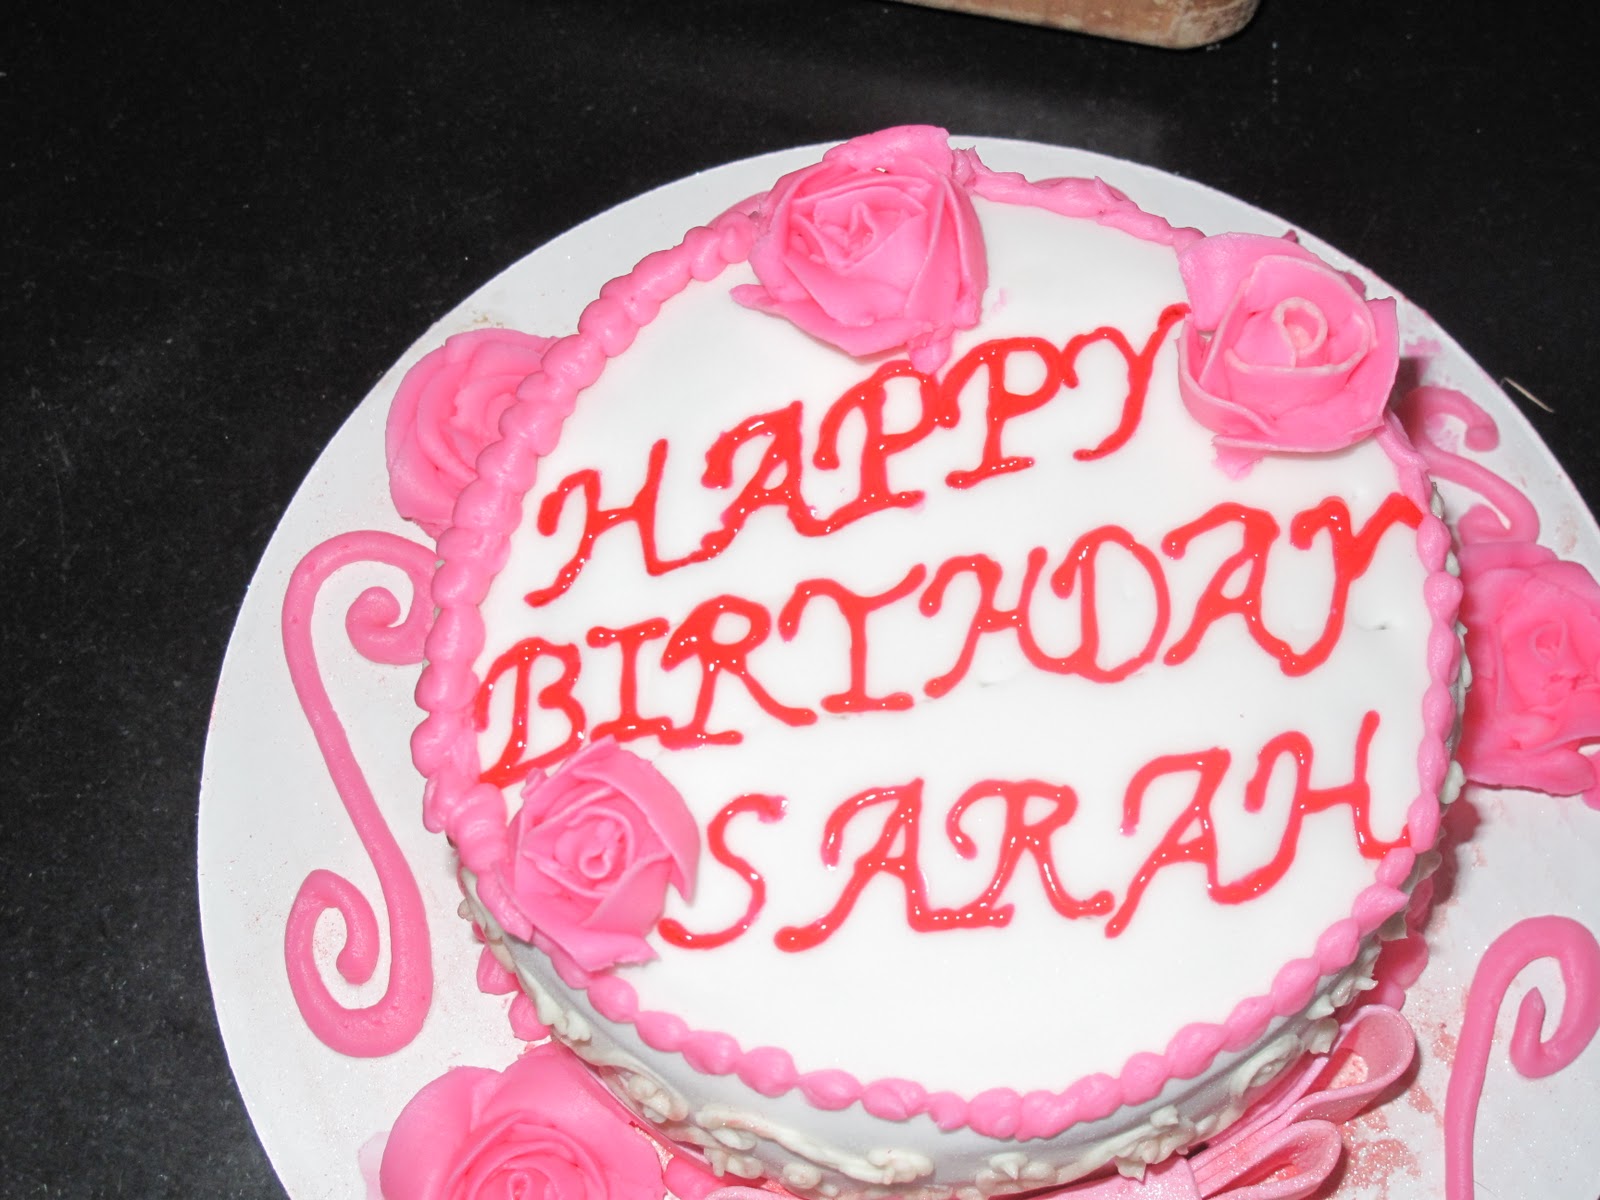
This is my petite birthday cake that I made for my best friend Sarah. It was a vanilla and chocolate cake with my homemade Reese's Buttercream filling. It is dirty iced and covered in white fondant. After that it is piped with white icing that is pained pearl pink. I also piped her the writing with red/pink piping gel.  The bow is made from gum paste it was actually the easiest thing on the cake to make. The roses were the hardest. They are white buttercream with pink food coloring. Buttercream Roses were the hardest thing for me to make. It took me at least 10 times to get it perfect. The top o the cake is just the same pink buttercream with the pearl tip piped along the edges to give it a nice border. I looked for ideas online for the perfect cake for Sarah and imitated the cake that was online with a few extra special things. This was the first and only cake so far that I have used a image or tutorial 
to help inspire me...Happy Birthday Sarah!